

How To Clean Fans Of Alienware 17
Introduction
If your Alienware 15 R2 overheats often or runs loudly, replacing or cleaning the fans should be the beginning thing you do. When working with computers, ever make sure to unplug your computer and ground yourself earlier reaching inner components so you don't accidentally release an electrical charge into the sensitive technology. The discharge could potentially damage your computer'southward internals.
-
-
Place laptop upside down with the swivel facing you, and then remove the two 9mm Phillips #0 screws located in the bottom left and right of the of the rear panel.
-
Remove the rear panel by using the iFixit opening tool to separate it from the back of the laptop.
-
-
-
Use the iFixit opening tool to disconnect the battery cable. Put the iFixit tool underneath the cable and then pull it to remove.
-
-
-
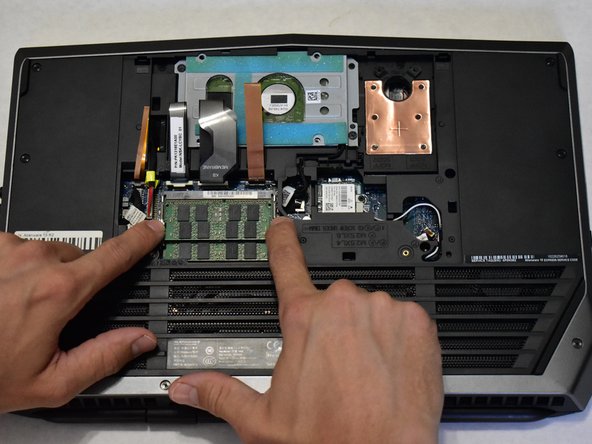
Discover the RAM located near the edge of the figurer closest to yous. Locate the small latches on either side of the RAM stick and push in the 2 latches to release. Gently grasp the RAM stick on either side and pull straight out. Repeat for the second RAM stick.
-
-
-
In the center of the RAM card, remove the 9 mm spiral using the Phillips #0 screwdriver.
-
-
-
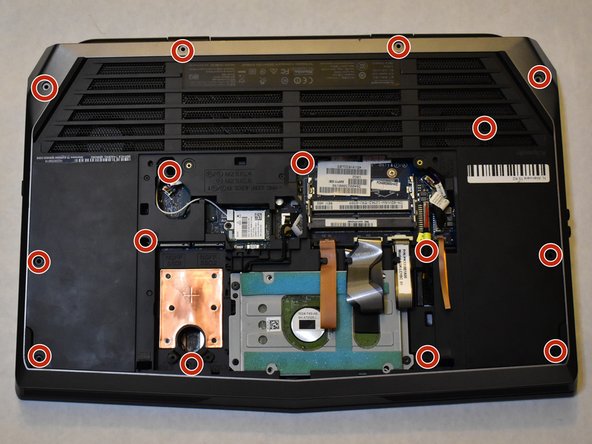
Remove all screws from the back casing. (4X 18mm, 4X 10mm, 4X 6mm)
-
Press your finger in the hole next to the hard bulldoze to elevator the keyboard upwards.
-
-
-
Disconnect the fan wires.
-
-
-
If you're replacing the fans, remove the three 6.0 mm screws from the fan and pull the fans out. (The orange circle shows where a screw will already exist removed). If yous're cleaning the fans, use compressed air to make clean the blades and air duct.
-


Conclusion
To reassemble your device, follow these instructions in opposite order.
Embed this guide
Choose a size and copy the code below to embed this guide as a small-scale widget on your site / forum.
Preview

Source: https://www.ifixit.com/Guide/Alienware+15+R2+Fan+Replacement/128435
Posted by: desmaraistang1999.blogspot.com
0 Response to "How To Clean Fans Of Alienware 17"
Post a Comment